 English
 简体中文
简体中文 Русский
 Español
 Deutsch
Learn how to level a snooker table step by step. Check slate, adjust feet, and test ball roll for a perfectly true playing surface. Read the full guide now.

Why Leveling Your Snooker Table Matters
A snooker table is a precision instrument. Even a tilt of a few millimetres across a 12-foot slate bed can send a ball drifting off line, turn a routine pot into a miss, and slowly erode your confidence at the table. Professional players and club owners alike understand that leveling is not optional maintenance — it is the foundation of fair, consistent play.
In this guide, we walk through the complete process of leveling a snooker table, from understanding why tables shift to the tools you need and the exact steps to get a perfect roll. Whether you own a full-size tournament table or a smaller home model, the principles are the same.

Understanding Why Snooker Tables Go Out of Level
Snooker tables are heavy — a full-size table with a 5-piece slate bed can weigh over 1,000 kg (roughly 2,200 lbs). That weight is normally supported by a sturdy frame and adjustable feet or legs. Over time, however, several factors cause the surface to drift away from true level:
- Settling floors: Wooden floors, especially in older buildings, compress and shift under constant load.
- Humidity and temperature changes: Slate, wood, and metal expand and contract at different rates, subtly warping the playing surface.
- Movement or relocation: Any time a table is moved, even slightly, the leveling is disturbed.
- Re-clothing or re-cushioning: Removing the cloth and working on the bed can shift slate joints and frame alignment.
- Worn foot pads: Rubber or felt pads under the legs compress over years of use.
If you notice balls rolling toward one corner, slow-rolling shots curving, or cushions playing inconsistently, leveling should be your first diagnostic step.
Tools and Materials You Will Need
Before you start, gather the right equipment. Using the wrong tools can scratch the slate or damage the cloth.
| Tool | Purpose |
|---|---|
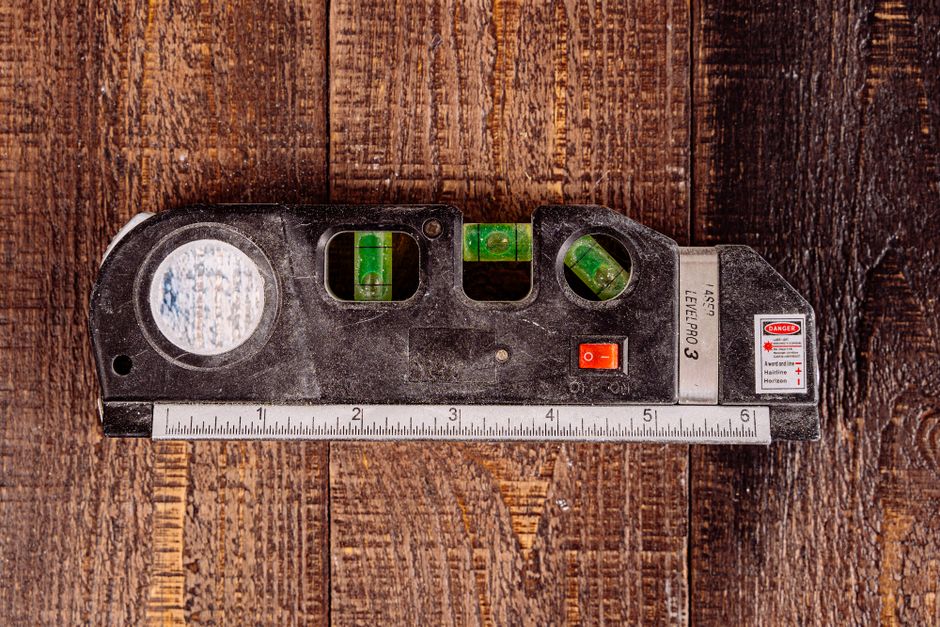
| Spirit level (long, 1200 mm / 4 ft) | Checking level across the length and width of the bed |
| Small torpedo level | Checking individual slate sections and short spans |
| Adjustable spanner / wrench | Turning the leveling feet or bolts |
| Wooden or rubber mallet | Tapping slate joints and frame blocks into place |
| Feeler gauges or playing cards | Measuring small gaps under the level |
| Anti-slip pads or shims | Fine-tuning under legs or feet |
| Clean microfiber cloth | Protecting and cleaning the cloth |
| Helper (optional but recommended) | Assisting with lifting and checking |
Never use metal tools directly on the cloth. If you must place anything on the bed, put a soft cloth underneath first.
Step-by-Step: How to Level a Snooker Table
Step 1: Prepare the Room and the Table
Clear the area around the table so you can walk freely on all four sides. Remove the balls, rests, and any accessories. Check that the table sits on a solid, flat floor — if the floor itself is uneven, you may need to address that first with proper underlay or a platform. Ensure the table is not touching walls or furniture, as this can create pressure points.
Step 2: Identify the Leveling Mechanism
Most snooker tables use one of two systems:
- Adjustable feet: Threaded feet at the bottom of each leg that can be raised or lowered with a spanner.
- Leveling bolts or wedges under the frame: Some tables have bolts under the slate frame or wooden wedges driven between the frame and the legs.
Locate the adjustment points before making any changes. Take a photo so you can return to the original settings if needed.
Step 3: Check the Level Lengthwise
Place your long spirit level along the centre line of the table, running from the baulk end to the black spot end. Watch the bubble carefully. If it sits off-centre, note which end is high and which is low. Repeat the check along both long rails, about 15 cm (6 in) in from the cushions.
Step 4: Check the Level Widthwise
Now place the level across the width of the table at three points: near the baulk line, at the centre spot, and near the top cushion. This reveals any side-to-side tilt. A table can be level lengthwise but tilted sideways, which causes balls to drift toward one cushion.
Step 5: Check the Slate Joints
On a multi-piece slate bed, place the level across each joint. If the bubble dips at a joint, the slates are not perfectly flush. This is a common cause of balls hopping or deviating. Use a wooden mallet to gently tap the slate sections into alignment, checking with a feeler gauge or a straight edge as you go.
Step 6: Adjust the Feet or Frame
Start with the lowest corner or end. Raise or lower the adjustment point in small increments — a quarter turn at a time. Re-check with the spirit level after every adjustment. Work systematically:
- Level the length first.
- Then level the width.
- Then fine-tune the diagonals by checking opposite corners.
Patience is key. Rushing this stage almost always results in a table that is level in one direction but not the other.
Step 7: Verify with a Ball Roll Test
Once the spirit level shows a true reading in all directions, place a ball on the table and give it a very gentle push. It should roll straight and come to rest without veering. Test along the length, across the width, and diagonally. Repeat at several spots on the bed. If the ball consistently drifts, go back to Step 5 and check the slate joints again.
Step 8: Recheck After 24–48 Hours
New adjustments can settle. Wait a day or two, then repeat the level checks. Small corrections now prevent bigger problems later. If the table is in a room with significant temperature or humidity swings, check it again after a week.
Tips for a Perfectly Level Table
- Work from the frame up: If the frame is twisted, no amount of foot adjustment will fix the bed.
- Use a long level: Short levels can sit on a high spot and give a false reading. A 4-foot level bridges minor surface variations.
- Adjust in tiny increments: A quarter turn can move a corner by several millimetres.
- Check the diagonals: A table can be level front-to-back and side-to-side but still twisted corner-to-corner.
- Keep records: Note the final settings so future adjustments are quicker.
- Consider professional help: For antique or tournament tables, a specialist fitter can level and re-cloth in one visit.
How Often Should You Level a Snooker Table?
For a home table, check the level every six months, or whenever you notice a change in roll. For club and commercial tables used daily, a monthly check is wise, with a full professional service once a year. If the table is moved, re-level it immediately — even a short move across a room can disturb the feet.
Common Mistakes to Avoid
Many owners make the same errors when leveling a table. Avoid these pitfalls:
- Adjusting only one corner and assuming the rest will follow.
- Using a short level and missing a slope along the full length.
- Over-tightening feet, which can crack the frame or strip threads.
- Ignoring the slate joints because the frame looks level.
- Forgetting to recheck after the table has settled.
When to Call a Professional
If your table has a warped slate, a damaged frame, or persistent roll that will not respond to adjustment, it is time to call a qualified snooker table fitter. They have specialist tools, including long straight edges and slate-lifting equipment, and can diagnose issues that are invisible to the untrained eye. For a full-size table with a three-piece or five-piece slate, professional leveling is often the safest and most accurate option.
Final Thoughts
Leveling a snooker table is a methodical, rewarding task. With a good spirit level, a spanner, and a little patience, you can transform a table that plays unpredictably into one that rolls true. Remember to check length, width, and diagonals, adjust in small steps, and verify with a ball roll test. Do it right, and every pot, safety, and century break will feel exactly as it should.
Share your site, game, table sizes and quantities — we reply with a sampling plan and a quotation.