
 English
 简体中文
简体中文 Русский
 Español
 Deutsch
How to Install a Yoga Hammock at Home Safely
Learn how to install a yoga hammock at home safely with the right ceiling anchors, hardware, and testing steps. Follow our step-by-step guide today!
Why Install a Yoga Hammock at Home?
A yoga hammock—sometimes called an aerial yoga swing or inversion hammock—turns any spare corner into a full-body decompression studio. Suspended from the ceiling, it supports your hips, spine, and shoulders so you can flow through poses, hang upside down, or simply rest in a gentle backbend. The benefits range from spinal traction and improved circulation to deeper stretches and better posture.
But a hammock under tension stores a surprising amount of energy. If it is mounted to a weak joist or installed with the wrong hardware, it can fail without warning. This guide walks you through every step of a safe home installation, from choosing the right location to testing the setup before your first class.

Understanding Yoga Hammock Types and Load Ratings
Before you drill a single hole, know what you are hanging. Most home yoga hammocks fall into three categories:
- Single-point hammocks: Suspended from one central anchor. They spin freely and are ideal for inversions and dance-style flows.
- Dual-point hammocks: Suspended from two anchors spaced apart. They feel more stable and are better for supported poses and restorative work.
- Inversion swings: A seat-style fabric with handles, usually hung from a single frame or ceiling point, designed mainly for decompression.
Check the manufacturer's stated working load. A quality hammock should support at least 300–500 lbs (136–227 kg) of static load, but that number assumes a properly rated anchor. Dynamic loads from swinging or bouncing can multiply the force on your ceiling by two or three times your body weight.
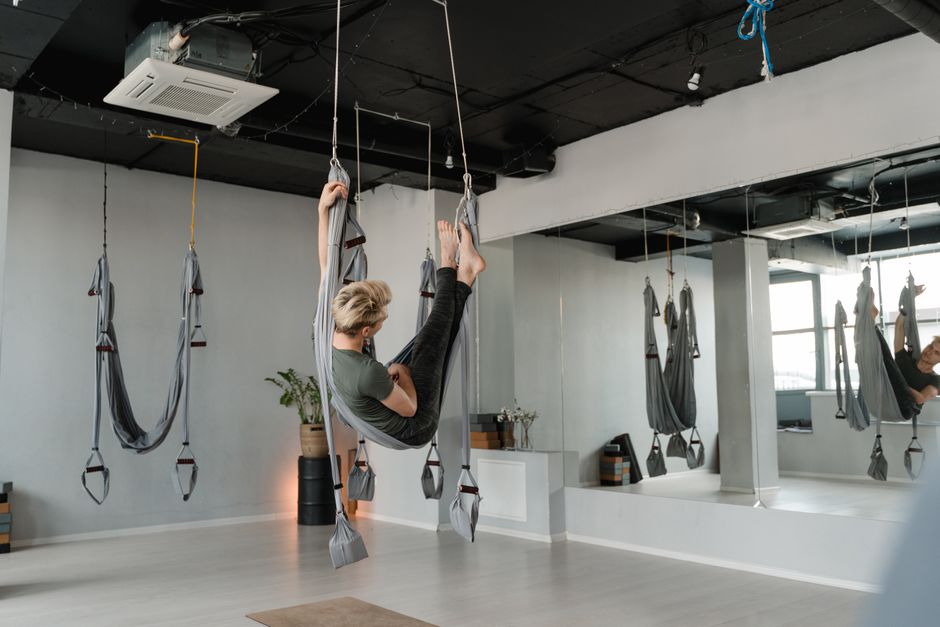
Choosing the Right Room and Ceiling Structure
Not every ceiling can hold a hammock. The safest installations use a structural beam or a joist, never drywall or plaster alone.
What to look for
- Solid wood joists: The gold standard. A 2x8 or larger joist in good condition can carry a hammock load when the anchor is centered.
- Engineered I-joists: Acceptable only if you reinforce the web with a manufacturer-approved bracket. Never drill through the top or bottom flange.
- Concrete ceilings: Require masonry anchors rated for overhead tension, such as wedge anchors or chemical anchors.
- Metal beams: Possible with beam clamps, but only if the beam is rated for the load and you use a locking mechanism.
Clear the area below. You need at least 8 feet (2.4 m) of ceiling height for most poses, and a 6-foot (1.8 m) radius of open floor so you never swing into furniture, walls, or a ceiling fan.
Tools and Hardware You Will Need
Using the hardware that came in a discount kit is risky. Upgrade to components rated for overhead lifting.
| Item | Specification | Why It Matters |
|---|---|---|
| Ceiling mount | Steel plate or bracket, 3–5 mm thick | Spreads load across the joist |
| Lag bolts | 3/8" x 4" minimum, grade 5 or better | Resists pull-out under dynamic load |
| Carabiners | Climbing-rated, 25 kN or higher | Prevents accidental opening |
| Daisy chain or straps | Rated to 2,000 lbs or more | Adjustable height without knots |
| Stud finder | Deep-scan model | Locates joists behind drywall |
| Drill and bits | Pilot bit sized to lag bolts | Prevents splitting the joist |
Step-by-Step Installation
Step 1: Locate the joists
Use a deep-scan stud finder to map the ceiling. Mark each joist with painter's tape. Joists are typically spaced 16 or 24 inches (40 or 60 cm) on center. If you have access to an attic, confirm the joist size and condition from above.
Step 2: Mark the anchor point
For a single-point hammock, choose one joist and mark its center. For a dual-point setup, mark two joists spaced 3–4 feet (0.9–1.2 m) apart, centered over your practice area. Keep the anchor at least 18 inches from any joist end or splice.
Step 3: Drill pilot holes
Drill pilot holes slightly narrower than your lag bolts. This prevents the wood from splitting while keeping the threads biting into solid timber. Drill straight and to the full depth of the bolt.
Step 4: Mount the bracket
Bolt the steel mounting plate directly into the joist using at least two lag bolts, ideally four. Do not use drywall anchors, toggle bolts, or screws alone. Tighten until the plate is flush and immovable.
Step 5: Attach the suspension
Clip the daisy chain or strap to the mount with a climbing-rated carabiner. Lock the gate. If your hammock uses a swivel, attach it between the carabiner and the fabric so the hammock can rotate without twisting the strap.
Step 6: Set the height
Hang the hammock so the lowest point of the fabric sits about 3–4 feet (0.9–1.2 m) above the floor when empty. That gives you room to sit, stand, and invert without your head touching the ground.
Testing Before Your First Practice
Never trust a new installation with your full weight on the first try. Follow this sequence:
- Hang a 50–75 lb (23–34 kg) sandbag or weight plate from the anchor and leave it for an hour.
- Inspect the bracket, bolts, and carabiner for any movement or deformation.
- Add weight gradually until you exceed your own body weight by at least 50%.
- Gently bounce and swing the load to simulate dynamic forces.
- Re-tighten all bolts after the test—wood compresses slightly under load.
If anything creaks, shifts, or looks stressed, stop and call a professional. A structural engineer or a licensed contractor can inspect the joist and recommend a fix.
Safety Rules for Everyday Use
- Inspect the hammock, straps, and carabiners before every session.
- Never exceed the manufacturer's weight limit.
- Keep at least 3 feet (0.9 m) of clearance from walls and furniture.
- Avoid sharp jewelry, zippers, and belt buckles that can snag the fabric.
- Practice inversions with a spotter until you are confident.
- Do not use the hammock if you have uncontrolled high blood pressure, glaucoma, vertigo, or are pregnant—consult a doctor first.
- Replace any strap or carabiner that shows fraying, rust, or deep scratches.
Common Installation Mistakes to Avoid
The most frequent error is anchoring into drywall or a ceiling fixture box. Both can rip out under load. The second is using hardware from a hardware store that is not rated for overhead lifting—look for a working load limit stamped on the component. The third is hanging the hammock too low, which forces you to bend your knees and puts your spine in a poor position. Finally, never install a hammock on a sloped or damaged ceiling without professional advice.
When to Hire a Professional
If you rent your home, live in a building with concrete or metal ceilings, or are unsure about the condition of your joists, hire a contractor. The cost of a professional install is small compared to the cost of a ceiling repair—or an injury. A qualified installer can also add a spreader beam that distributes the load across multiple joists, which is the safest option for older homes.
Final Thoughts
A yoga hammock is one of the most rewarding home fitness investments you can make. It decompresses your spine, deepens your stretches, and adds a playful element to your practice. Install it correctly, test it thoroughly, and inspect it often, and you will enjoy years of safe, supported movement. When in doubt, choose the stronger anchor, the higher-rated hardware, and the professional opinion—your ceiling, and your body, will thank you.
Share your market, quantities and rigging situation — we reply with a sample plan and timeline.